Visualizzazione post con etichetta AALL&Create Guest Design. Mostra tutti i post

martedì 23 giugno 2020

Look on the Bright Side...


Ciao a tutti e bentornati! 
Oggi vi presento una pagina di Art Journal dal sapore 'Steampunk/Industrial', che ho fatto per il Guest DT di AALL&Create.  Ho volutamente mantenuto gli spessori e gli strati al minimo...il mio Art Journal è già lievitato di suo, tanto che faccio fatica a chiuderlo con l'elastico, Lol!
Volevo dare massimo risalto al bellissimo timbro #322 'FLORAL WINGS', disegnato da Olga Heldwein, che fa parte della nuova release uscita a Maggio...

Hello everyone and welcome back!
Today I want to show you a 'Steampunk/Industrial' Art Journal page that I have created for AALL&Create Guest DT. I wanted to keep layers and thickness at minimun, since my Art Journal is already a bit bulky and I can't even close it properly anymore, Lol!
At the same time, though I wanted to really draw the attention to the focal point, this beautiful stamp #322 'FLORAL WINGS' designed by Olga Heldwein, and that is part of the new release that came out in May...

Ed ora...senza ulteriori indugi...ecco il tutorial:
And now...without further ado...here's the tutorial:


Ho timbrato con Versafine Ink Onyx Black su carta riso usando il timbro A4 #142 'EDISON GAME' sempre disegnato da Olga, ho asciugato leggermente e poi incollato alla pagina di Art Journal usando del Gel medium matte. Ho coperto poi alcuni punti con il Gesso Bianco ed asciugato bene.

I stamped with Versafine Ink Onyx Black on rice paper using A4 stamp  #142 'EDISON GAME', also designed by Olga, then adhered on the Journal page using Gel Medium matte, then covered here and there with White Gesso. Dried very well.


Ho usato il colore Frayed Burlap nelle versioni DISTRESS STAIN, DISTRESS OXIDE INK, DISTRESS OXIDE SPRAY Ink...per me è bellissimo vedere come cambia il colore a seconda del medium usato...e comunque il Frayed Burlap rimane uno dei miei colori preferiti!

I have used FRAYED BURLAP to add colour to my page, using DISTRESS STAIN, DISTRESS OXIDE INK and DISTRESS OXIDE SPRAY Ink...to me it's beautiful to see how the colour changes according to the medium used...and by the way, Frayed Burlap still is one of my fave colours!


Ho usato lo Stencil #71 'STEAM COGS' disegnato...indovinate un pò? Ovvio, dalla bravissima Olga, con i seguenti DISTRESS INKS: Rusty Hinge, Vintage Photo e Ground Espresso ed il Blending Tool, poi ho timbrato con il Timbro #363 'QUIRKY COBBLES' disegnato da Autour de Mwa, e parte della nuova release. Per aggiungere le timbrate ho usato il Distress Oxide Frayed Burlap.

I have used Stencil #71 'STEAM COGS' designed by...guess who? Yes, it's her, the talented Olga
with the following DISTRESS INKS: Rusty Hinge, Vintage Photo and Ground Espresso with a Blending Tool, then added a bit more of interest with Stamp #363 'QUIRKY COBBLES' designed by Autour de Mwa, always part of the new release. To stamp I used Distress Oxide Frayed Burlap.


Ora va bene limitare gli strati, ma adoro usare il washi tape con i DISTRESS CRAYONS per aggiungere interesse...qui ho usato il Designer Tape 'French' di Tim Holtz con i colori Rusty Hinge, Vintage Photo e Black Soot. Mi piace usare i Distress Crayon per 'definire' la mia pagina e darle un'aspetto 'vissuto'.

Now...that's ok keeping the page quite simple and flat, but I love adding interest using washi tape with DISTRESS CRAYONS ...here I have used Designer Tape 'French' by Tim Holtz with  Rusty Hinge, Vintage Photo and Black Soot.. I really like using Distress Crayons to 'define' my page and give it a 'distressed aged' look.


E qui mi sono dimenticata di fare le foto di alcuni passaggi, quindi ve li racconto a voce:
Ho stampato questa meravigliosa ala con il Versafine Onyx Black...dai ma non è bellissima...io più la guardo e più me ne innamoro...allora dicevo...ho coperto poi il tutto con uno strato di Gesso Clear.
In pratica lo uso per tutte le immagini che timbro, mi permette di usare anche cartoncini non propriamente da acquerello e colorare l'immagine con qualsiasi medium.
Per colorare questa ho usato i pennarelli Tombow Dual Brush, poi ho ombreggiato intorno alle lampadine usando i Polychromos Dark Sepia e Soft Black.
Ho stampato di nuovo l'immagine, ho ritagliato le lampadine ed ho aggiunto qualche ombreggiatura leggera. Ho stampato la lampadina più grossa (che è un particolare del timbro A4 usato per lo sfondo) ed aggiunto qualche tocco di colore, poi ho iniziato ad incollare i vari elementi .

And this is when I realized that hadn't taken more pictures of  in-between steps, so here we go:
I stamped this beautiful wing using Versafine Onyx Black...c'mon isn't it gorgeous? The more I look at it the more I love it...anyway...I covered all the image with Gesso Clear, this step helps me when I want to add color using water based media, like watercolour crayons or Distress Markers or Tombow Dual Brush pens, like I did in this case. Then I added more shadows around the light bulbs using Polychromos pencils by Faber-Castell, Dark Sepia and Soft Black.
Stamped again the image and fussy cut few elements, adding very subtle shadows, I stamped also a bigger light bulb (which is part of the A4 stamp used as background), added few touches of colour and fussy cut it, then began to glue down the pieces.


Ho timbrato un cartoncino con il Timbro #280 'ENUMERATED' sempre disegnato da Olga, ho invecchiato il tutto usando i Distress Ink Rusty Hinge, Vintage Photo e Ground Espresso, poi ho ritagliato le immagini che volevo utilizzare e sfruttando la lenta asciugatura dei Distress le ho ricoperte con la Polvere da Embossing Baked Texture 'Vintage Beeswax' di Seth Apter...adoro l'effetto invecchiato che da questa polvere.
Ho finito di incollare gli altri elementi, ho aggiunto i sentiments usando gli Stickers Small Talk di Tim Holtz e la mia pagina è finita.

I stamped a piece of cardstock using Stamp #280 'ENUMERATED' always designed by Olga, then aged the image using Distress Inks Rusty Hinge, Vintage Photo and Ground Espresso, cut out the images I wanted to use then, taking advantage of the slow drying time of the Distress inks I covered everything with Seth Apter's Baked Texture 'Vintage Beeswax' embossing powder ...I really love the aged look you can achieve with this powder.
Finished to glue down all the elements, then added sentiments using Tim Holtz Small Talk Stickers and my page is done.


Spero che questa pagina vi sia piaciuta, vi ringrazio per essere passati di qua...ci si vede alla prossima!

I do hope you enjoyed this page and I thank you for stopping by...see you next time!

Kisses&Hugs...and stay safe!
Simo

martedì 16 giugno 2020

#12MMITags2020 Giugno: Grow...


Ciao a tutti e bentornati! Oggi vi parlo della Tag del Mese di Giugno per la challenge delle #12MMITags2020 nel Gruppo Facebook Mixed Medi@ Italia ...e della mia ispirazione per questa settimana per il Guest DT di  AALL&Create .

Hello everyone and welcome back! Today I'm here to show you my June Tag for the monthly challenge #12MMITags2020 in the Facebook Group Mixed Medi@ Italia ... and my inspiration for this week for   AALL&Create Guest DT.

Ecco la Moodboard per il mese di Giugno - Here's the Moodboard for the Month of June


Iniziamo... Come sempre trovate la lista dei materiali usati alla fine del post...
Let's begin...As usual you'll find the supply list at the end of this post...


Per prima cosa ho ricoperto la tag con della Collage Paper usando del Gel medium Matte, una volta asciutto ho coperto con Gesso bianco e poi con la Pasta Stencil ho aggiunto dei dettagli usando questi due bellissimi stencil di AALL&Create, entrambi disegnati da Olga Heldwein. Fanno parte delle collezioni precedenti, ma li adoro...

I have glued Collage Paper onto the tag using Matte Gel Medium, then covered it with White Gesso. Once dry I added few details using Stencil Paste and these lovely stencils by AALL&Create both designed by Olga Heldwein. They are part of past collections, but love them nonetheless...


Con 3 diverse tonalità di acrilico giallo, partendo dal tono più scuro al più chiaro, ho colorato la tag, togliendo poi qua e là del colore con una salviettina umida. Ho incollato dei pezzetti di pagina di libro, poi ho timbrato tono su tono usando prima il timbro 'Mesh' creato da Tracy Evans con il Distress Oxide 'Fossilized Amber', poi ho aggiunto dei particolari del timbro 'Bold Alpha mini' creato da Bipasha Bk inchiostrati con il Tombow Dual Brush Pen n.026 'Yellow Gold'.

I painted the Tag using 3 different shades of Yellow acrylic paint, from the darker to the brighter, then lifted colour here and there using a baby wipe. I glued few tiny strips of book page, then stamped using 'Mesh' stamp designed by Tracy Evans with Distress Oxide 'Fossilized Amber', then added details from  'Bold Alpha mini' stamp designed by Bipasha Bk inked with Tombow Dual Brush Pen n.026 'Yellow Gold'.


Ora aggiungiamo dei tocchi di viola! Prima ho incollato dei pezzetti di washi tape, poi ho usato il Gelato 'Grape' sui bordi e per scurire il washi, poi ho aggiunto dei tocchi di cera Antique Brilliance 'Amethyst Magic'. Infine ho timbrato dei numeri che si trovano nel nuovo set di timbri 'IRIS' disegnato da Tracy Evans, usando il Distress Ink 'Wilted Violet'

Now let's add touches of purple! First of all I glued pieces of washi tape and used 'Grape' Gelato on the edges and to darken the tape, adding also touches of Antique Brilliance wax 'Amethyst Magic'.
Then I stamped the numbers that you can find in the new stamp set 'IRIS' designed by Tracy Evans, using Distress Ink 'Wilted Violet'.


 Su un pezzo di cartoncino per acquerello ho spruzzato in pratica tutti i viola che ho tra i miei colori:
Distress Oxide Spray 'Wilted Violet', Lindy's Gang Starburst 'Prima Donna purple', 13Arts Ayeeda Mist 'Pastel Lavender' e  Infusions 'Violetta' della PaperArtsy.
Da qui ho ritagliato la forma di un vaso per il mio Iris, ed ho usato un pezzetto come banner, che ho attaccato con la graffatrice ed un punto di colla.
Sempre su cartoncino ho timbrato il fiore, che ho colorato con un colore acrilico e poi con pastelli acquarellabili. Ho ritagliato ed assemblato il tutto, aggiungendo degli stickers ed una mini clip.
Come tocco finale ho 'sporcato' il tutto con gocce di Uniposca bianco.

On a piece of watercolour cardstock I have used every possible purple I have in my stash:
Distress Oxide Spray 'Wilted Violet', Lindy's Gang Starburst 'Prima Donna purple', 13Arts Ayeeda Mist 'Pastel Lavender' and PaperArtsy Infusions 'Violetta', then I cut out a little pot for my Flower and stapled a small strip as banner.
On a piece of cardstock I stamped the Iris and coloured first with an acrylic paint then with watercolour pastels. I fussy cut it (sort of..lol) and glued everything down, adding also few stickers and a mini clip.  As final touch I splattered everything using a white Posca pen.

Ecco qualche dettaglio...  Here's few details...


Spero che la Tag vi sia piaciuta! La combo è un pò insolita ma il forte contrasto la rende vibrante e viva...io devo dire che con questi timbri Tracy è riuscita a farmi amare i fiori...per lo meno questo non mi morità mai!

I do hope you liked this tag! I know the colour combo is quite strong and unusual, but the contrast makes it vibrant and bold...I must also say that with these stamps Tracy is making my love for flowers grow...at least this one will not die on me!

Be Bold...Be Brave...Take your Time...Keep Growing!

Grazie per essere stati in mia compagnia...ci vediamo alla prossima!
Thank you for stopping by...see you next time!

Kisses&Hugs...and stay safe!
Simo.

Lista materiali / Supply List:

AALL&Create Stamps: 
#333 'IRIS' - #262 'MESH' designed by Tracy Evans
#349 ' BOLD ALPHA MINI' designed by Bipasha Bk
AALL&Create Stencils:
#47 'CIRCLES OF LIFE' - #37 'CRACKED WALLS 1' designed by Olga Heldwein

TommyArt Stencil Paste Light
Deco-Art Americana Acrylic paints: 
MUSTARD SEED, MOON YELLOW, FRENCH VANILLA, DIOXAZINE PURPLE
PaperArtsy Infusions 'VIOLETTA'
Lindy's Gang Starburst 'PRIMA DONNA PURPLE'
13Arts Ayeeda Mist 'PASTEL LAVENDER'
Faber-Castell Gelato 'GRAPE'
Tombow Dual Brush Pen #026 'YELLOW GOLD'
Prima/Finnabair Art Alchemy Antique Brilliance Wax 'AMETHYST MAGIC'
Ranger/Tim Holtz:
Distress Oxide Spray 'WILTED VIOLET'
Distress Oxide Ink 'WILTED VIOLET', 'FOSSILIZED AMBER'
Distress Ink mini 'WILTED VIOLET'
Tim Holtz Idea-Ology:
Collage Paper 'HALLOWEEN'
Mini Paper Clips
Big Chat Stickers
Small Talk Stickers


giovedì 26 dicembre 2019

AALL & Create Guest DT - Friendship


Ciao a tutti e buon Santo Stefano! Spero abbiate passato un giorno di Natale speciale...quanto a me, visto che oggi è il mio compleanno, voglio celebrarlo con voi con una tela mixed media sull'amicizia...un dono prezioso e quanto mai raro...
Quindi, senza indugi...ecco il tutorial!

Hello everyone and Happy Boxing Day! I do hope you had a special Christmas day...as for me...well today it's my Birthday and I want to celebrate with you with this mixed media canvas about Friendship...a very precious and quite rare gift...
So, without further ado...here's the tutorial!


Ho stampato il timbro 'Border stamp #232 'Friendship' di AALL & Create su carta riso e l'ho incollato su di una tela con Soft Gel medium di Finnabair. Ho incollato anche pezzi di pagine di libro, washi tape, retina adesiva e della carta 'a nido d'ape' che avevo in casa da secoli. Ho poi passato un po' di Heavy White Gesso di Finnabair su tutta la superficie.

I stamped the Border stamp #232 'Friendship' by AALL & Create on rice paper and glued to a canvas using Soft Gel medium Matte by Finnabair, then added design tape (Idea-ology 'French' by Tim Holtz), drywall tape and a 'honeycomb' rice paper I've had in my stash for centuries. Lightly covered everything with a wash of Heavy White Gesso by Finnabair.


Con lo Stencil #45 di AALL & Create ho aggiunto dei tocchi di colore usando i Distress Oxide Old Paper, Iced Spruce e Peacock Feathers: ho steso il colore sullo stencil, ho spruzzato con acqua e poi l'ho premuto sulla superficie tamponando con un foglio di carta da cucina. Ho asciugato bene tra un colore e l'altro.

I added colour using Stencil #45 by AALL & Create and Distress Oxide inks: Old Paper, Iced spruce and Peacock Feathers: I applied the ink onto the stencil, spritzed with water and then pressed onto the canval, tapping with a piece of kitchen paper. I dried well before adding the next colour.


Ho aggiunto un po' di dettagli con il timbro #262  'Mesh' e poi con lo stencil #39, sempre di AALL & Create, e la Pasta Stencil Light di TommyArt. Ho fatto asciugare bene.

Added few details using stamp #262 'Mesh' and stencil #39, by AALL & Create, with TommyArt Stencil Paste Light. I let that dry well.


Ho coperto il tutto con Heavy White Gesso di Finnabair, per legare gli elementi, e poi ho spruzzato con i Distress Oxide sprays Vintage Photo e Iced Spruce, diluendo con acqua a seconda della necessità. Ho poi stampato i vari elementi, ritagliati, aggiunto carta, garza, pizzo e vellum e poi incollato il tutto. Per finire ho schizzato con Uniposca bianco ed aggiunto delle  Nuvo Crystal drops.

Covered with Finnabair Heavy White Gesso to 'tie' together all the details, then used Distress Oxide Sprays Vintage Photo and Iced Spruce, adding water to move the colour around.
I stamped the focal point elements, fussy cut and die cut them, then added few layers of paper, gauze, lace and vellum and glued everything in place. As final touches I spatterd with white Posca pen, and added few Nuvo Crystal drops here and there.

Ecco qualche dettaglio... Here's few details...


Questo è il mio ultimo progetto per il 2019, come Guest DT per AALL & Create...è stato un'anno bellissimo e pieno di soddisfazioni  e creare con i loro timbri e stencil è stato un'onore, un piacere e mi sono divertita tantissimo.

This is my last project as AALL & Create Guest DT for this 2019...has been an amazing and very satisfying year, and create with their stamps and stencils has been an honour, a pleasure and I had so much fun.

Vi ringrazio per essere passati di qua e vi auguro un meraviglioso 2020...ci vediamo presto!

Thank you for stopping by and I wish you a wonderful 2020...see you soon!

Kisses&Hugs!
Simo.

AALL & Create products used:

Border Stamp #232 + Matching Die #17 'Friendship' by Olga Heldwein
Stamp #262 'Mesh' by Tracy Evans
Stamp #198 'Voyager' by Olga Heldwein
Stencil #45 'Digital Bubbles' by Autour de Mwa
Stencil #39 'Lotza Dotzs' by Autour de Mwa

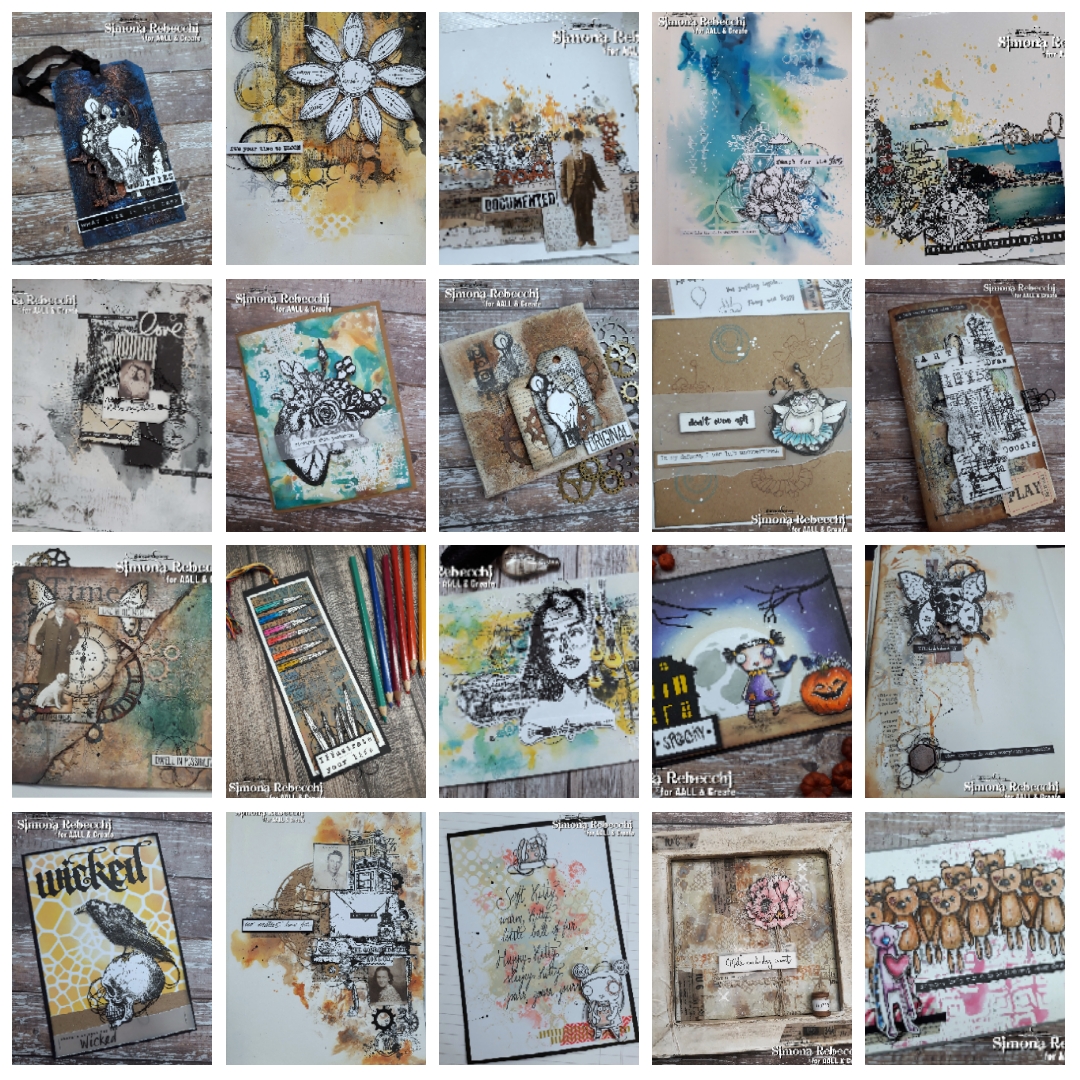
Ecco alcuni dei miei lavori come Guest DT per il 2019:
Here's some of my 2019 projects as Guest DT :


venerdì 30 novembre 2018

Catching up...

Ciao a tutti! E' da un bel po' di tempo che non passo da queste parti...ed il mio senso di colpa non mi dava tregua...Lol! Ci tengo a precisare però che non mi sono fatta prendere dalla pigrizia...anzi!
Come già spiegato in QUESTO POST ho avuto l'onore di essere stata chiamata a far parte del GUEST DESIGN TEAM per l'ultimo trimestre del 2018, dal meraviglioso Autour de Mwa, anima e cuore del brand AALL & CREATE...ecco quindi una carrellata dei progetti fatti finora, utilizzando i loro timbri e stencils.

Hello everyone! It has been a while since I wrote on these pages...and my guilt was too overwhelming...Lol! I may not have posted much...on this blog, but sure I kept creating as if there is no tomorrow! As already explained IN THIS POST, I've had the honour of being asked to be part of the GUEST DESIGN TEAM for the last three months of 2018, by the amazing Autour de Mwa, soul and heart of AALL & CREATE Brand...here's the pics of my projects so far, made using their stamps and stencils:


Ma non mi sono limitata a questo...vuoi non partecipare ad un paio di sfide anche? Quindi ecco il resto...

Do you really think I could stop myself from taking part to some challenges too? Ha...you know me too well, don't you? So here's my projects...


Qui ho finalmente usato il LUMBER 3D Texture Fades Embossing Folder...ma quanto lo adoro??? Davvero un'effetto meraviglioso e tattile...Distress Oxides come se piovesse e la mia Baked Texture preferita di Seth Apter, cioè la ROCKY ROAD, su corvo e piuma...

Here I have finally used my LUMBER 3D Texture Fades Embossing Folder...oh how much I love it! What a wonderful effect...lots of Distress Oxide Inks and my favourite Seth Apter's Baked Texture, that is ROCKY ROAD, both on the Raven and the feather....

Grazie a questa tag sono stata inclusa nello Spotlight di SIMON SAYS STAMP MONDAY CHALLENGE Blog per la sfida THANKS/THANKSGIVING...Felicissima...sempre un'onore!

Thanks to this tag I have been included in the Designer Spotlight over at SIMON SAYS STAMP MONDAY CHALLENGE Blog - THANKS/THANKSGIVING challenge...So happy and always an honour!
CLICK TO GO TO THE SSS POST

E sono stata scelta dal Design Team di FRILLY AND FUNKIE per partecipare come Guest Designer in una prossima sfida... Grazie ancora...ne sono felicissima!

And I have been chosen by the Design Team members over at FRILLY AND FUNKIE Challenge Blog to be a Guest Designer in a future challenge...Thanks so much again...I am so so happy!

CLICK TO GO TO THE POST

Infine questo è il mio ultimo progetto...una pagina del mio MINI ART JOURNAL, che può essere usata anche come card...fatta per la Sfida di Simon Says Stamp - Let it snow, della scorsa settimana, e che segna il mio ingresso ufficiale nel CHRISTMAS MOOD!

Finally here's my latest project...a page of my MINI ART JOURNAL, but it could also be used as card...made for last week's Monday challenge, over at Simon Says Stamp - Let it Snow, and that officially marks my switching from Halloween to CHRISTMAS MOOD!


Wow...ce l'ho fatta...recuperato 1 mese in 1 post...ed ora...pronta a ripartire con Dicembre! Sarà un mese intenso, con alcune novità, in primis l'inizio del 1° CALENDARIO DELL'AVVENTO targato MIXED MEDI@ ITALIA (@mixedmediaitalia )...ogni giorno verrà postato un nuovo lavoro, rigorosamente in stile Mixed Media, quindi seguite gli hashtags #mixedmediaitalia #avventoMMI per poterli vedere.

Wow...I made it...recap 1 month in 1 post...and now...ready to start with December! It will be quite a full month, with some news, first of all the beginning of the 1st ADVENT CALENDAR made by MIXED MEDI@ ITALIA (@mixedmediaitalia )...every day will be posted a new Mixed Media project, hence follow these hashtags #mixedmediaitalia #avventoMMI so you will not miss them.


Con questo è veramente tutto...grazie per essere passati di qua...ci vediamo alla prossima!

Well...this is it...thanks so much for stopping by...see you next time!

Kisses&Hugs!
Simo.

giovedì 25 ottobre 2018

The Parting Guest...AALL & Create Guest Design project


Ciao a tutti e bentornati! Qualche tempo fa mi è stato chiesto di diventare Guest Designer per AALL & Create fino a fine Dicembre...vi lascio immaginare la mia gioia...adoro i loro timbri e stencil, quindi poterci giocare a piene mani è veramente il massimo!
Questo è il mio secondo progetto, realizzato in pieno spirito di Halloween...ve lo avevo detto che ero entrata in Halloween MODE on giusto?

Hello everyone and welcome back! Some time ago I have been asked to join as Guest Designer the amazing Team of AALL & Create, till the end of December...well...just imagine how much this has meant to me, how happy and honoured I am...I love their stamps and stencils and being able to have fun and play with these gorgeous goodies is absolutely amazing!
This is my second project for the GDT, and I am in full Halloween mode...didn't I warn you I was going full Halloween MODE On?


Ho utilizzato del cartoncino per acquerello e per lo sfondo ho usato i Distress Oxide Inks: Iced Spruce, Hickory Smoke, Stormy Sky, Black Soot e Ripe Persimmon...perchè un tocco di arancio ci sta troppo bene, ed anche perchè è diventato il mio colore preferito...lol!
Ho fatto cadere delle gocce di acqua, poi ho scurito bene i bordi e la porzione superiore con il Distress ink Black Soot, ho fatto cadere delle gocce di inchiostro bianco e poi con lo stencil #37 'Cracked walls 1' creato da Olga Heldwein e la modeling paste nera della DecoArt Media ho creato il 'muretto', per aggiungere un po' più di interesse.
Con le fustelle Movers&Shapers Vintage Cabinet e mini Cabinet ho creato la lapide del povero Signor John Doe, e la parte superiore della tag, ho incollato delle lettere ritagliate con le thinlits 'Alphanumeric' e la Decorative Strip 'Wanted Alphabet', ho coperto di gesso bianco e poi colorato con i Distress Oxide e gli Ink pads Hickory Smoke e Black Soot, poi ho scurito ed invecchiato il tutto con i Distress Crayons negli stessi colori. Poi con il Distress Oxide Black Soot ho timbrato con uno dei timbri nella plancia #125 'For the Record' creati da Aida Domisiewicz, per simulare le crepe. Ho stampato la luna dal set #22, fantasmi, zucchetta e banner dal set #136 'Spooks' entrambi di Olga Heldwein...il bello di questo set è che avete tante espressioni tra cui scegliere perchè sia il fantasma che la zucca sono vuoti nel mezzo...quindi potrete sbizzarrirvi. Per colorare le timbrate ho usato dei pennarelli acquarellabili, poi sui fantasmini ho steso un po' di Distress ink Antique Linen...mi sembrava perfetto!
Ho fustellato il corvo con le thinlits 'Feather & Ravens', ho incollato i vari pezzi ed ho utilizzato i Clipping stickers Halloween per aggiungere il testo.

I have used watercolour heavy cardstock and did my background using Distress Oxide Inks: Iced Spruce, Hickory Smoke, Stormy Sky, Black Soot and Ripe Persimmon...because a touch of orange is perfect...and because this colour is becoming my favourite...lol!
I flicked some droplets of water, then darkened the edges with Black Soot Distress ink pad, added DecoArt Media Black Modeling paste through stencil #37 'Cracked walls 1' designed by Olga Heldwein, to give a bit more of interest.
With Movers&Shapers dies Vintage Cabinet and Mini Cabinet I have created the tombstone and the top part of the tag, glued letters die-cut with 2 different Alphabet dies, covered with gesso and then painted with Distress Oxides and Ink pads Hickory Smoke and Black Soot, then darkened with the same colours in Distress Crayons .With Distress Oxide Black Soot I have stamped the 'cracks' with one of the stamps of the set #125 'For the Record' designed by Aida Domisiewicz.
Have used set #22 to stamp the Moon, set #136 'Spooks' to stamp the Ghosts, the pumpkin and the banner...both these stamp sets are designed by Olga Heldwein...what's great about the 'Spooks' stamp set is that both Pumpkin and Ghost are blank and you have a lot of expressions to choose from...is just so much fun! For the colouring I have used water based brush pens, then on the Ghosts I have added a hint of Antique Linen Distress ink...seemed so appropriate!
Die-cut the Raven with 'Feather&Ravens' thinlits, glued together all the pieces and added text with Halloween Clipping Stickers.


Allora...che ne dite di questa scena spaventosa? He he he...ma chi voglio prendere in giro...non sono troppo adorabili questi fantasmini?

So.. what do you say about this Scary scene? He he he...who I am kidding? They are too cute to spook!

E con questo vi saluto...grazie per essere passati di qua...ci vediamo alla prossima!

That's it...thanks for stopping by...see you next time!

Kisses&Hugs!

Simo.