Visualizzazione post con etichetta Dicembre. Mostra tutti i post

giovedì 26 dicembre 2019

AALL & Create Guest DT - Friendship


Ciao a tutti e buon Santo Stefano! Spero abbiate passato un giorno di Natale speciale...quanto a me, visto che oggi è il mio compleanno, voglio celebrarlo con voi con una tela mixed media sull'amicizia...un dono prezioso e quanto mai raro...
Quindi, senza indugi...ecco il tutorial!

Hello everyone and Happy Boxing Day! I do hope you had a special Christmas day...as for me...well today it's my Birthday and I want to celebrate with you with this mixed media canvas about Friendship...a very precious and quite rare gift...
So, without further ado...here's the tutorial!


Ho stampato il timbro 'Border stamp #232 'Friendship' di AALL & Create su carta riso e l'ho incollato su di una tela con Soft Gel medium di Finnabair. Ho incollato anche pezzi di pagine di libro, washi tape, retina adesiva e della carta 'a nido d'ape' che avevo in casa da secoli. Ho poi passato un po' di Heavy White Gesso di Finnabair su tutta la superficie.

I stamped the Border stamp #232 'Friendship' by AALL & Create on rice paper and glued to a canvas using Soft Gel medium Matte by Finnabair, then added design tape (Idea-ology 'French' by Tim Holtz), drywall tape and a 'honeycomb' rice paper I've had in my stash for centuries. Lightly covered everything with a wash of Heavy White Gesso by Finnabair.


Con lo Stencil #45 di AALL & Create ho aggiunto dei tocchi di colore usando i Distress Oxide Old Paper, Iced Spruce e Peacock Feathers: ho steso il colore sullo stencil, ho spruzzato con acqua e poi l'ho premuto sulla superficie tamponando con un foglio di carta da cucina. Ho asciugato bene tra un colore e l'altro.

I added colour using Stencil #45 by AALL & Create and Distress Oxide inks: Old Paper, Iced spruce and Peacock Feathers: I applied the ink onto the stencil, spritzed with water and then pressed onto the canval, tapping with a piece of kitchen paper. I dried well before adding the next colour.


Ho aggiunto un po' di dettagli con il timbro #262  'Mesh' e poi con lo stencil #39, sempre di AALL & Create, e la Pasta Stencil Light di TommyArt. Ho fatto asciugare bene.

Added few details using stamp #262 'Mesh' and stencil #39, by AALL & Create, with TommyArt Stencil Paste Light. I let that dry well.


Ho coperto il tutto con Heavy White Gesso di Finnabair, per legare gli elementi, e poi ho spruzzato con i Distress Oxide sprays Vintage Photo e Iced Spruce, diluendo con acqua a seconda della necessità. Ho poi stampato i vari elementi, ritagliati, aggiunto carta, garza, pizzo e vellum e poi incollato il tutto. Per finire ho schizzato con Uniposca bianco ed aggiunto delle  Nuvo Crystal drops.

Covered with Finnabair Heavy White Gesso to 'tie' together all the details, then used Distress Oxide Sprays Vintage Photo and Iced Spruce, adding water to move the colour around.
I stamped the focal point elements, fussy cut and die cut them, then added few layers of paper, gauze, lace and vellum and glued everything in place. As final touches I spatterd with white Posca pen, and added few Nuvo Crystal drops here and there.

Ecco qualche dettaglio... Here's few details...


Questo è il mio ultimo progetto per il 2019, come Guest DT per AALL & Create...è stato un'anno bellissimo e pieno di soddisfazioni  e creare con i loro timbri e stencil è stato un'onore, un piacere e mi sono divertita tantissimo.

This is my last project as AALL & Create Guest DT for this 2019...has been an amazing and very satisfying year, and create with their stamps and stencils has been an honour, a pleasure and I had so much fun.

Vi ringrazio per essere passati di qua e vi auguro un meraviglioso 2020...ci vediamo presto!

Thank you for stopping by and I wish you a wonderful 2020...see you soon!

Kisses&Hugs!
Simo.

AALL & Create products used:

Border Stamp #232 + Matching Die #17 'Friendship' by Olga Heldwein
Stamp #262 'Mesh' by Tracy Evans
Stamp #198 'Voyager' by Olga Heldwein
Stencil #45 'Digital Bubbles' by Autour de Mwa
Stencil #39 'Lotza Dotzs' by Autour de Mwa

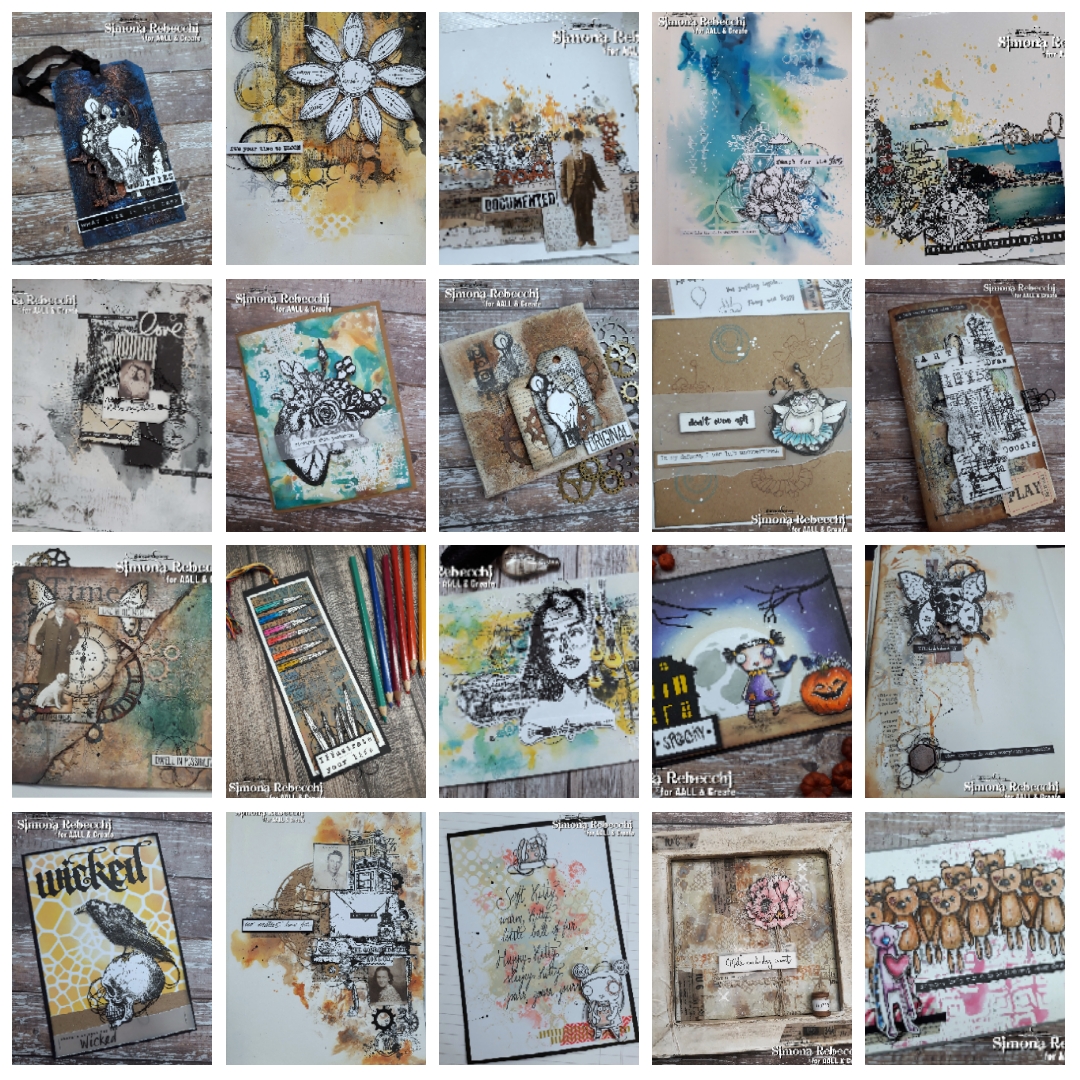
Ecco alcuni dei miei lavori come Guest DT per il 2019:
Here's some of my 2019 projects as Guest DT :


venerdì 20 dicembre 2019

#12MMITags Dicembre 2019 - Winter Wishes


Ciao a tutti! Ma ci credete che siamo già ad un passo da Natale? Io veramente non so dove finisca il tempo...sono sempre in ritardo con tutto! He he he...
Comunque eccoci qui, con l'ultima Tag delle #12MMITags del Gruppo Facebook Mixed Medi@ Italia (che a dire il vero sono 11, perchè in estate abbiamo unito 2 mesi...eh va beh dai...licenza poetica!) E' stato un bellissimo viaggio con il nostro gruppo, culminato con una fantastica sorpresa che alcune delle amiche hanno fatto a noi Admin...un calendario dell'avvento tutto 'Made in Mixed Media'...scoprire ogni giorno una 'casellina' nuova, con relativo lavoro fatto con il cuore mi ha riempito di gioia e soddisfazione...e mi ha fatto versare pure qualche lacrima di commozione. Grazie ancora ragazze...siete magnifiche...
Ed ora...basta con le chiacchere e sotto con il tutorial...


Hello everyone! Can you believe it? Christmas day it's almost here...how is it possible that time flies away so much...I'm always late with everything!
Anyway...here's the last Tag of the year for the Facebook Group Mixed Medi@ Italia - #12MMITags - December 2019 (ok...technically they are 11, as for July and August we asked for a single tag... well let's say it's a 'poetic licence')-
So...without further ado...let's start with the tutorial:


Ho iniziato a decorare la Tag con il Distress Oxide Candied Apple e lo stencil di Tim Holtz Holiday Knit, scurendo alcune parti con il D.O. Aged Mahogany. Poi ho steso la pasta Stencil Light di TommyArt usando lo stencil Holiday Script, sempre di Tim Holtz.

I started my background using Distress Oxide Candied Apple and Tim Holtz Layering stencil Holiday Knit, darkening in few spots with D.O. Aged Mahogany. Then added texture with TommyArt Light stencil paste and T.H. Holiday Script stencil.


Quando la pasta era ben asciutta, ho iniziato a spruzzare con gli inchiostri spray di Lindy's Stamp Gang: prima con Flat Fabio Rizzo's Rowdy Red, poi con lo Starburst Poinsettia Red Gold.
Ho asciugato bene, poi ho schizzato la Tag con Uniposca Bianco ed Oro.

When dry I sprayed with Lindy's Stamp Gand inks: Flat Fabio Rizzo's Rowdy Red and Starburst Poinsettia Red Gold, dried again then spattered with White and Gold Posca pens.


E qui mi sono scordata di fare le foto...allooora....ho aggiunto del washi tape, dei fermacampioni a forma di fiocco di neve, un pezzetto di carta dal set Winter Tales della 13@rts, degli Ephemera a tema Natale e li ho fermati con la graffatrice. A parte ho fustellato ed embossato il Fiocco di neve con la fustella Tim Holtz Layered Snowflake (che viene venduta con il relativo embossing folder) usando un cartoncino di recupero: ho ricoperto con Heavy Black Gesso di Finnabair, poi ho usato le cere Metallique Old Silver e Vintage Gold per dare luce. Ho incollato il fiocco di neve, la Paper Doll e la Quote Chip natalizia. Ho aggiunto uno sticker ed un charm della linea Idea-ology di Tim Holtz.
E la Tag è finita!

Obviously I forgot to take pictures of the next steps....soooo....I added design tape, few snowflakes brads, built my layers using scraps from design paper Winter Tales by 13@rts, and Idea-ology Christmas Ephemera and stapled them onto the Tag. I die cut and embossed a scrap of cardboard using Tim Holtz Layered Snowflake Bigz die, covered with Heavy Black Gesso by Finnabair, and added highlights with Art Alchemy Metallique waxes Old Silver and Vintage Gold.
Glued the snowflake, the Paper Doll, a Christmas Quote Chip, then added finishing touches with a Metallic sticker and an Idea-ology Adornment charm.
And that's all!


Con questa tag partecipo alla seguente sfida/ I submit this tag to the following challenge:

- A VINTAGE JOURNEY BLOG: Holly Jolly Christmas

Grazie per essere passati di qua e per avermi tenuto compagnia per quest'anno!
Vi auguro di passare un felice Natale con le persone che amate e ci vediamo il 26 Dicembre con l'ultimo progetto del 2019!

Thank you so much for stopping by, throughout this year!
I wish you all a very Merry Christmas, with the people you hold dear...and I will wait for you on 26th December with the last project of this 2019!

Kisses&Hugs!

Simo

Ed eccole qui tutte le Tags del 2019 - Here they are my Tags  #12MMITags

lunedì 24 dicembre 2018

24 Dicembre 2018 #avventoMMI - Mixed Medi@ Italia


Ciao a tutti e bentornati su queste pagine! Wow...ormai ci siamo...domani è Natale! Francamente mi sto chiedendo dove sia finito questo 2018...perchè io non l'ho neanche visto passare, tanto andava di fretta! Comunque...oggi si conclude questa iniziativa che abbiamo lanciato nel gruppo Facebook MIXED MEDI@ ITALIA...il nostro primo Calendario dell'Avvento, rigorosamente in stile mixed media, unico vincolo l'uso del colore rosso (che a dire il vero ha creato non poco scompiglio tra le nostre amiche...he he he)
Ogni giorno un'artista diversa ha creato un progetto, condividendo foto, passaggi, tutorial o video.. E leggere nei commenti che, anche le meno esperte si sono divertite a mettersi alla prova è stata fonte di ispirazione e commozione...ed io ringrazio tutte davvero con il cuore...siete state meravigliose!
Ma ora eccoci qua...il 24 Dicembre ce lo siamo diviso la mia socia Admin Giuliana Ballatore ed io (così come il 1° Dicembre hanno pubblicato le altre mie 2 amiche Admin Terelisa Agosti e Sabrina Perna)...questo il mio mini progetto...poteva non essere una tag? Potevo non usare una Paper Doll? Ma dai scherziamo? Mi conoscete ormai no? Quindi...iniziamo!

Hello everyone and welcome back! Wow...here we are...tomorrow it's Christmas already...where did this year go? Anyway today, 24th of December it's the last day of the Advent Calendar hosted by our Facebook Group MIXED MEDI@ ITALIA ...every day a different artist created a mixed media project, the only rule was to add a touch of RED. Seeing all these amazing projects in our Album has been so heartwarming...knowing that everyone had so much fun while creating has been inspiring and moving...and I thank each and everyone of you who took part in this...you are truly amazing!
As we are 4 Admins, we decided to start and end the Calendar, two posting on the 1st of December and two on the 24th...and this is my take...Obviously it's a Tag...and yes, of course I have used a Paper Doll...hey...you know me by now, right? So...without further ado...let's start!


Ho ritagliato un pezzo di cartone pressato, ho tagliato via gli angoli superiori per dargli la forma di una Tag ed ci ho incollato sopra della carta patterned della 13Arts (Winter Tales disegnata da Olga Heldwein). Con la carta vetrata ho 'distressato' i bordi, poi ho sigillato il tutto con Gesso Clear di Prima/Finnabair.

Used a piece of heavy weight cardboad, giving it the shape of a Tag, I glued on top a patterned paper from 13Arts (Winter Tales designed by Olga Heldwein), distressed the edges then gave it a coat of Clear Gesso by Prima/Finnabair.


Con la Pasta Stencil Light della linea TommyArt e lo stencil Holiday Script di Stampers Anonymous/Tim Holtz ho aggiunto un po' di texture, ho coperto con un lieve strato di gesso bianco con la tecnica del drybrushing, cioè pennello asciutto e quasi completamente scaricato del colore, poi ho spruzzato con lo spray Flat Fabio 'Rizzo Rowdy Red' della Lindy's Stamp Gang, spruzzando acqua per diluire l'intensità del colore e farlo muovere. Una volta ben asciutto ho aggiunto i Distress Oxide Inks Candied Apple e Frayed Burlap schiacciando il pad dell'inchiostro su di un pezzo di acetato, spruzzandolo con acqua e poi premendo l'acetato qua e là sulla Tag. Un colore alla volta, asciugando bene tra un passaggio e l'altro, ho fatto cadere delle gocce di acqua, poi ho schizzato con l'inchiostro Starburst 'Poinsettia Red Gold' della Lindy's Stamp Gang, e con un Uniposca bianco. Poi ho di nuovo aggiunto qualche colpetto di gesso bianco, specie sui bordi ed evidenziato le scritte in rilievo con la Metallique Wax Vintage Gold di Prima/Finnabair.

Used TommyArt Light Stencil Paste and Holiday Script Layering Stencil by Stampers Anonymous/Tim Holtz to add texture, drybrushed a thin layer of white gesso then added colour with Lindy's Stamp Gang 'Rizzo Rowdy Red' Flat Fabio, spritzing with water to dilute and move the ink. When dry, added Distress Oxide Inks Candied Apple and Frayed Burlap, spattered with Starburst 'Poinsettia Red Gold' ink by Lindy's Stamp Gang and a white Posca pen. More white gesso especially on the borders, then highlighted the stencil paste with Metallique 'Vintage Gold' wax by Prima/Finnabar.


Ho poi agginto qualche timbrata giusto per aggiungere più interesse allo sfondo ed usato il Distress Ink Black Soot lungo tutti i bordi. Per creare il punto focale ho usato della garza sfilacciata, un pezzo di carta patterned rossa, delle Ephemera della linea Idea-ology di Tim Holtz, una Paper Doll, una Rosette a forma di fiocco di neve, ottenuta con la Decorative Strip 'Mini Snowflake Rosette' di Sizzix/Tim Holtz Alterations ed una Christmas Quote Chip.
Come tocco finale ho fatto un buco con la Crop-a-Dile per inserite un nastro e del baker's twine, ai quali ho aggiunto un charm in metallo della linea Idea-ology 'Adornments' ed un campanellino.

Stamped here and there to add interest to the background, used Black Soot Distress Ink on the edges, built the focal point using cheese cloth, a piece of red patterned paper, Tim Holtz Idea-ology Ephemera, a Christmas Paper Doll, a snowflake made with Decorative Strip 'Mini Snowflake Rosette' by Sizzix/Tim Holtz Alterations and a  Christmas Quote Chip.
As final touches made a hole with my Crop-a-Dile to insert ribbon and baker's twine, then added a metal Idea-ology Adornment and a tiny bell.


Se volete vedere tutti i progetti del Calendario dell'Avvento Mixed Medi@ Italia, potete dare un'occhiata QUI, sul nostro profilo INSTAGRAM - @mixedmediaitalia #avventoMMI #mixedmediaitalia

If you want, you can find all the projects of our Advent Calendar on our INSTAGRAM profile - @mixedmediaitalia   hashtags #avventoMMI #mixedmediaitalia

Grazie per essere passati...auguro a tutti uno splendido Natale, in compagnia delle persone a voi care...noi ci vediamo alla prossima!

Thanks so much for stopping by...I wish you all a very Merry Christmas day, shared with all your loved ones...
See you next time!

Kisses&Hugs!
Simo

martedì 11 dicembre 2018

Warm Winter Wishes...


Ciao a tutti! Un post veloce per farvi vedere una tag preparata per la nuova sfida del Lunedì sul blog di Simon Says Stamp Monday Challenge  il tema è Warm Winter Wishes...ecco quindi i miei auguri per la Stagione più bella che ci sia!

Hello everyone! Just a quick post to show you a tag made for this week's challenge over at Simon Says Stamp Monday Challenge Blog - the theme is Warm Winter Wishes, so here's my personal wishes for the most wonderful Time of the year!


Per questa tag ho utilizzato varie fustelle della serie Tim Holtz Alterations, che elencherò in fondo al post. Per colorare la base ho usato i Distress Oxide inks Frayed Burlap e Antique Linen, poi ho timbrato il sentiment dal set Handwritten Holidays 1 di Stampers Anonymous/Tim Holtz collection ed embossato con la polvere Distress Embossing Powder Vintage Photo della Ranger, su un pezzo di vellum. Per finire ho aggiunto un paio di Christmas Clippings stickers ed un nastro.


For this Tag I have used quite a selection of Tim Holtz Alterations Dies - will list them at the end of this post. I added colour to the base with Distress Oxide inks Frayed Burlap and Antique Linen, then stamped a sentiment from the set Handwritten Holidays 1 by Stampers Anonymous/Tim Holtz on a piece of vellum and embossed with Ranger Distress Vintage Photo embossing powder. As final touches added a couple of Idea-Ology Christmas Clippings stickers and a matching ribbon.


Ecco l'elenco delle fustelle usate
Here's the list of Sizzix/Tim Holtz Alterations Dies used:
Tag Collection Framelits
Tree Ring Bigz w/embossing folder
Candlelight Bigz
Mini Holiday Green Thinlits

Spero vi sia piaciuta questa tag! Grazie per essere passati di qua...ci vediamo alla prossima!

Hope you liked this tag! Thank you for stopping by...see you next time!

Kisses&Hugs!
Simo.

domenica 2 dicembre 2018

Season Greetings...Home Decor


Ciao!  Eccoci in Dicembre...con il mio ultimo progetto per il DT di MarteLAB! E' stata proprio un'avventura esplorare Marte, e devo dire che.ho avuto la fortuna di avere delle compagne di viaggio eccezionali, che lungo la strada si sono trasformate in vere Amiche!
Ora basta sentimentalismi e torniamo al post... Ho deciso di lavorare su una delle ETCETERA tags di Tim Holtz, la misura piccola, cioè  10”x 5 ½ “ - cioè 25,5 x 14 cm ca. - non oso pensare a che spazio occupa la versione Grande...lol! 

Hello! Here we are...in December, with my last project for MarteLAB DT! What an adventure has been, exploring Mars, enhanced by the luck of having some amazing travel companions, who became real Friends along the way!
Ok...enough 'mushy stuff' and let's go back to the post...I have decided to work on Tim Holtz Small ETCETERA Tag, which measures 10”x 5 ½ “ - I can't even imagine how big is the Large version...lol!

Come sempre potete andare a leggervi il tutorial in italiano sul Blog di MarteLAB QUI

Without further ado...let's start!


I have used 13Arts 'Winter Tales' patterned paper, designed by Olga Heldwen, to cover the tag... just placed the tag onto the paper and traced all around, leaving a couple of millimiters of excess. Once glued in place,  I distressed the paper all around the edges to achieve a worn-out look, that I really love. After that I gave it a coat of Prima/Finnabair Clear Gesso.


Using TommyArt Light Stencil Paste through Tim Holtz Holiday Script Layering Stencil, I added a bit of texture, then drybrushed White Gesso in random areas and on the edges.


I pressed Frayed Burlap Distress Oxide ink onto a piece of acetate, sprayed with water and then added on the tag, just 'pouncing' around to add the colour. Dried with a heat tool and then spritzed&flicked some water. Once dry, I did the same with Aged Mahogany D.O.

Now it's time to build the focal point...I have used bits and pieces of paper, vellum, torn book pages and some thread.
I have die cut the flower with Tim Holtz Alterations Tattered Poinsettia BIGz die and then dry embossed the petals with the matching Embossing folder, a very lucky purchase of the past few days!
To enhance the raised parts I have used Finnabair Art Alchemy waxes: Antique Brilliance Lucky Emerald and Metallique Vintage Gold.
Used the following Dies to cut out the embellishments:
Sizzix Tim Holtz Alterations Mini Holiday Greens thinlits
Sizzix Tim Holtz Alterations Vintage Tidings thinlits
Sizzix Tim Holtz Alterations Tattered Pinecone
I added touches of Lucky Emerald wax and Vintage Gold wax on the Greens, the pearls that form the centre of the Poinsettia, the pinecone and the word 'Peace'.
Glued a small branch with berries using Glossy Accents, then, obviously, I couldn't keep myself to use some adorable Christmas Paper Dolls. As final touches added a  memo pin with an Adage ticket, a Holiday talk Metallic sticker, a loop pin and a Christmas Adornment...all these are from the Idea-ology line. I splatter everything with very diluted white gesso.
Painted the reinforcer for the tag with Aged Mahogany, then few touches of Vintage Gold wax. Glued in place and added some ribbon and baker's twine.
Here's few details...


I submit this tag to the following challenges:


Like every year I usually make something that could be easily used as 'last minute gift' ...but I have to admit that I would love to display this tag in my living room for the next month...maybe a gift to myself? 

Thanks so much for stopping by...I hope you enjoyed the project! Will try to get back during the month...but, just in case ....have a Great Holiday Season y'all!

Kisses&Hugs!
Simo.

venerdì 15 dicembre 2017

Enjoy the Journey!


Ciao a tutti...eccomi con un progetto un po' diverso dal mio solito...un Layout...
Dovete sapere che in queste ore si sono aperte le iscrizioni al Nazionale ASI 2018 che avrà come tema 'Enjoy the Journey!'...un'esperienza totalmente nuova per me...comunque nell'attesa hanno organizzato una sfida: preparare un Layout 30x30 che contenesse 1 foto di un viaggio, una valigia ed una cartina geografica...e questo è il risultato...


Ho scelto la foto della spiaggia di Elafonissi, Creta...un'acqua meravigliosamente limpida  e dai colori caraibici, come potete vedere...la sua particolarità è di essere collegata a Creta da una lingua sottile di terra,  che a seconda delle maree scompare sott'acqua, e di avere la sabbia a tratti rosa...Un paesaggio selvaggio e davvero meraviglioso che ci ha colpito molto.

Per questo layout ho voluto utilizzare le tonalità del turchese, che amo, e qualche tocco di blu, ovviamente usando i fidati sprays della Lindy's. Avendo come tema il viaggio ho aggiunto dei tocchi con la Modeling Paste e lo stencil 'Traveler' di Tim Holtz, poi ho usato la fustella 'Vintage Globe' sempre di Tim Holtz, ma al posto del mappamondo ho messo una 'punchata' di una cartina di Creta. Ho ritagliato la valigia da una card per planner, ho usato dei timbri 'Carabelle' e 'Visible Image' , delle bolle ritagliate con una fustella Sizzix e la scritta 'Travel' è una fustella della Kesi'Art.
Contrariamente al mio solito, mi sono astenuta dall'usare il Distress Ink Black Soot per 'sporcare'' i bordi del foglio...in realtà mi piace l'idea di non avere dei bordi ben delineati...

E con questo vi saluto...ci vediamo alla prossima!

Kisses&Hugs!
Simo


giovedì 14 dicembre 2017

A Peaceful Christmas...


Ciao a tutti!!! Bentornati su queste pagine...oggi vi voglio mostrare il mio nuovo progetto per la Sfida del Lunedì di SIMON SAYS STAMP...che è diventato una nuova decorazione per l'albero di Natale!

Hello everyone!!! Welcome back on these pages...today I want to show you my new project for this week's Challenge over at SIMON SAYS STAMP MONDAY CHALLENGE BLOG...and  soon became a new decoration for my Christmas tree!

SIMON SAYS...CHRISTMAS/WINTER HOLIDAYS...


Non so se lo avete visto, ma QUI  potete trovare un fantastico Tutorial che il nostro amato TIM HOLTZ ha postato sul suo Blog...la versione 'Timholtziana' di una palla di neve...un villaggio innevato racchiuso in una sveglia...geniale! Quindi ho pensato di creare una mia personale versione di una scena innevata...ovviamente utilizzando i materiali a mia disposizione...
Come per il mio post precedente, Time for Icy Inspiration,  ho creato una scena invernale notturna usando sia i Distress Inks che gli Oxides...ho fatto la base partendo dal basso con D.I. Cracked Pistachio, Peacock Feathers, Salty Ocean, Stormy Sky e Black Soot. Ho asciugato e sono ripassata con gli Oxides, Cracked Pistachio, Peacock Feathers, Broken China, Faded Jeans e Black Soot. Asciugato ed accentuato con D.I. Stormy Sky e D.O. Black Soot, poi ripassati i bordi con D.I. Black Soot. Il solito giochino dello 'Spritz-n-Flick' e poi gocce di inchiostro bianco per simulare i fiocchi di neve.
Nel mio ultimo giretto all'HobbyShow del Garda ho trovato questa deliziosa fustella, perfetta per questo progetto! Ho ritagliato sia da cartoncino nero che bianco, utilizzando quest'ultimo solo per gli alberi innevati..una volta incollato al suo posto ho dipinto di acrilico bianco la base ed aggiunto della modeling paste per creare qua e là dei piccoli mucchietti di neve.

I don't know if you already saw it, but HERE you can find the amazing Tutorial that our Beloved TIM HOLTZ posted on his Blog...an enchanted Snowglobe Clock...genius! So I have decided to create my own version of  a snowy scene...using what I had in my stash...
As for my previous post, Time for Icy Inspiration, I have created a winter night scene using both Distress Inks and Oxides...starting from bottom to top, used D.I. Cracked Pistachio, Peacock Feathers, Salty Ocean, Stormy Sky and Black Soot, I dried then went over with  my Oxides, Cracked Pistachio, Peacock Feathers, Broken China, Faded Jeans e Black Soot. Dried again and enhanced with D.I. Stormy Sky and D.O. Black Soot, then used D.I. Black Soot on the edges. Time for the old 'Spritz-n-Flick' trick then few drops of white ink for the falling snow.
During my latest visit to a craft market fair, I bought this lovely die...perfect for this scene! Die-cut both from black and white cardstock, using the white only for the trees...once glued in place I painted with white acrylic paint the base and added modeling paste here and there, for the snow on the ground.


Ora è il momento di assemblare il tutto....Ho deciso di utilizzare la metà di una sfera acrilica del diametro di circa 15,5 cm e dopo averla rivestita di carta riso, ho incollato il cartoncino decorato in precedenza, ho aggiunto della paglietta, pigne decorative,  nastro e delle fustellate utilizzando le seguenti fustelle Sizzix/Tim Holtz Alterations: 'Mini Holiday Greens' , 'Tattered Poinsettia',  la parola 'PEACE'  del set 'Vintage Tidings' e 'Mini Snowflake Rosette'.

Now it's time to assemble the Wintery Scene...I decided to use half of an acrylic Christmas ball, diameter approx 6 inches, coated with rice paper and glued the decorated scene in place. Added some wood shavings, decorative pinecones, ribbon and die-cuts from Sizzix/Tim Holtz Alterations dies: 'Mini Holiday Greens', 'Tattered Poinsettia', 'Vintage Tidings' (PEACE) and 'Mini Snowflake Rosette'.

Ed ecco la mia nuova decorazione al suo posto, sull'albero...
And there it is, my new ornament in its rightful place on the tree...


EDIT: con questo progetto partecipo anche alla sfida mensile 'Winter Wonderland ' sul blog 'A VINTAGE JOURNEY' ...

I submit this project also to the monthly challenge 'Winter Wonderland' over at 'A VINTAGE JOURNEY' Blog...

E con questo è tutto...grazie per essere passati...ci vediamo alla prossima!

That's it...thank you for stopping by...see you next time!

EDIT: So happy to be on the Designer Spotlight over at SIMON SAYS STAMP Monday Challenge Blog...


Kisses&Hugs!
Simo.

domenica 10 dicembre 2017

Time for Icy Inspiration...


 Ciao a tutti e bentornati! Siamo alla seconda settimana di Dicembre e sono già in panico da ritardo cronico...ditemi che non succede solo a me....mille cose da fare e poco tempo per riuscire a farle tutte...
Nonostante tutto, comunque...ecco, giusto sul filo di lana,  il mio lavoro per la Sfida del Lunedì di SIMON SAYS STAMP - ICY INSPIRATION...qui sotto la bellissima MoodBoard creata da Maura ...

Hello and welcome! It's the second week of December, already and I'm just panicking...please don't tell me it's just me...thousands things to do and not enough time...
Nevertheless...barely on time, here's my project for the Monday Challenge over at SIMON SAYS STAMP Blog - ICY INSPIRATION...here's the beautiful MoodBoard created by Maura...


Non male come ispirazione...se poi aggiungiamo che oggi sono scesi i primi fiocchi di neve, ecco che nasce questa Tag/card/potenziale cover per un junk journal...
Ho creato lo sfondo prima con i Distress Inks e poi con gli Oxides, alternando i colori sui toni dell'azzurro, blu ed infine nero. Ho asciugato e schizzato con acqua, ho timbrato l'immagine degli alberi (Tim Holtz/Stampers Anonymous) con inchiostro archival nero, poi ho fatto cadere delle gocce di inchiostro bianco per simulare la neve, ho timbrato dei fiocchi con inchiostro argento ed infine ho incollato il fiocco di neve in acetato, ottenuto utilizzando la fustella 'Layered Snowflake' Sizzix/Tim Holtz. Come tocco finale ho timbrato ed embossato il mio sentiment su vellum.

Not bad as inspiration...and on top of that, today we had the first flurry snowflakes, so here it is my Tag/card/could-be junk journal cover...
I created the background first with Distress Inks, then with Oxides, building the scene with shades of blues and black. Dried and flicked with water, stamped the trees (Tim Holtz/Stampers Anonymous stamp) with black archival ink, splattered with white ink for the snow, stamped snowflakes with silver ink and then glued the big snowflake die-cut from acetate using 'Layered Snowflake' die by Sizzix/Tim Holtz alterations. As a final touch I stamped and embossed my sentiment on vellum.


E con questo è tutto....ci vediamo alla prossima!

That's all for now...see you next time!

Kisses&Hugs!
Simo.


EDIT:

Sono felicissima di essere stata inclusa nel DESIGNERS SPOTLIGHT di SIMON SAYS STAMP con questo progetto....

I'm so happy to be featured in the DESIGNERS SPOTLIGHT over at SIMON SAYS STAMP MONDAY CHALLENGE BLOG with this project...